
 October 30, 2026
 AI SEO Canada, Canadian Hosting, Hosting, SEO, VPS Hosting canada, Web Hosting Canada, Web Hosting Toronto, WordPress
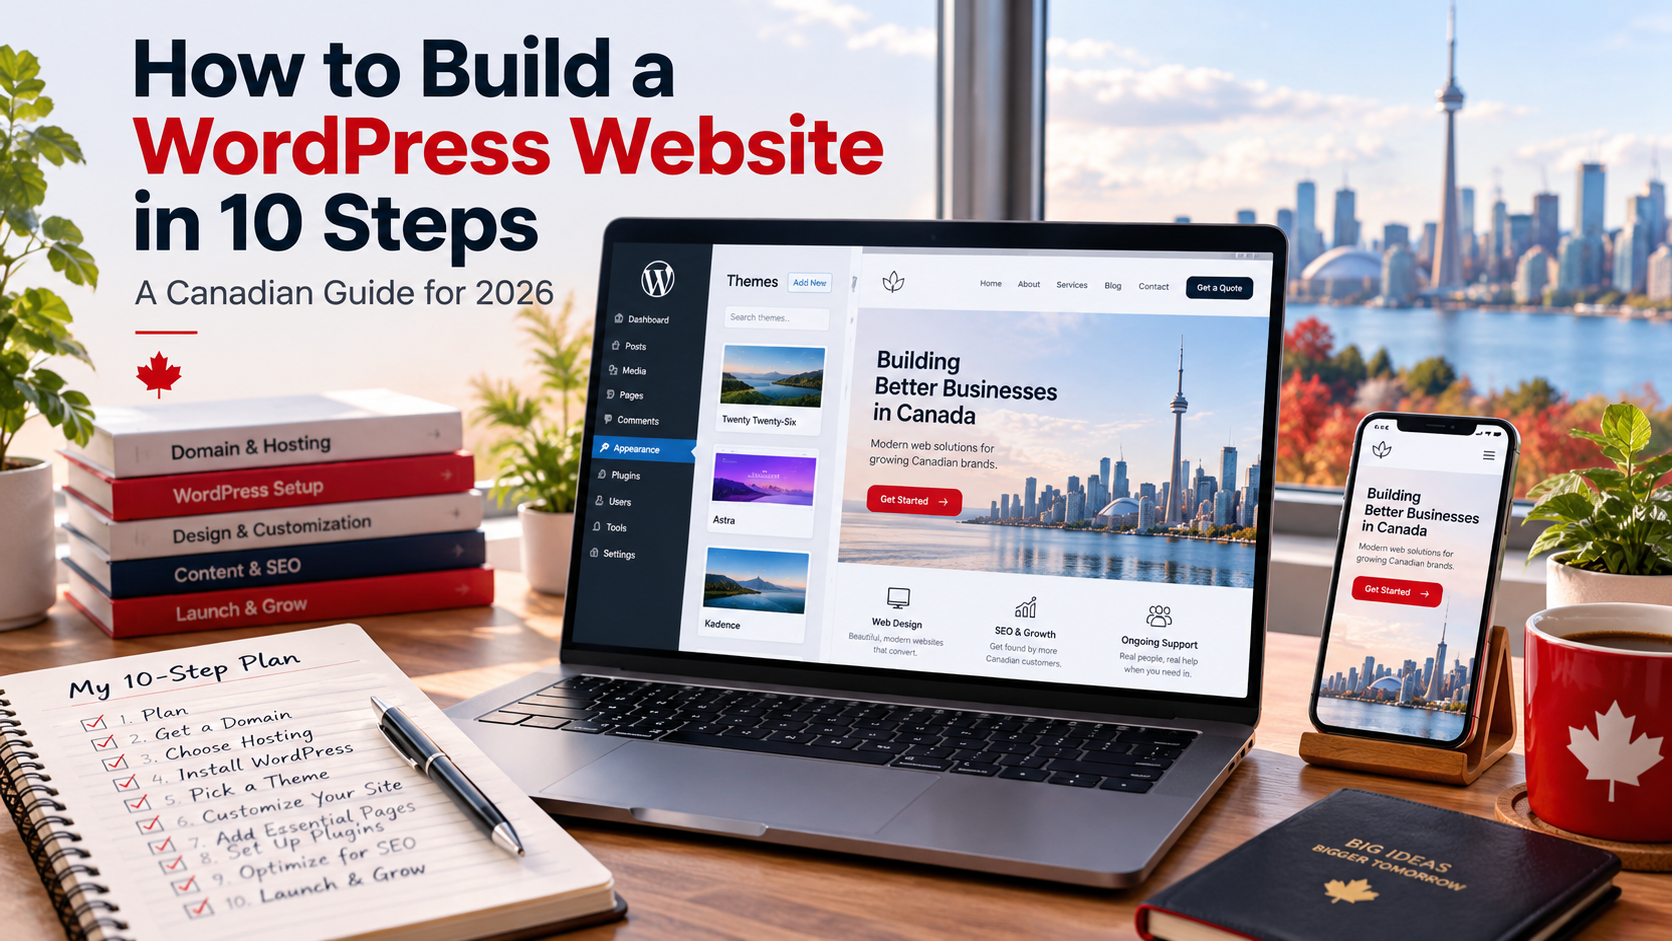
Short answer: To build a WordPress website: plan your pages, register a domain, choose WordPress hosting, install WordPress, secure it with SSL certificates, pick a theme, add a few essential plugins, create your pages, set up the basics of SEO for websites, then test and launch. Most small business sites can be built in a few days to a few weeks. Choose hosting in Canadian data centers if your customers are Canadian, keep plugins to a minimum, and plan for updates and backups after launch.
WordPress powers a large share of the web because it’s flexible, widely supported and free to use. You can start with a simple five-page site and grow it into a blog, an online store, a booking system or a membership site without changing platforms. That flexibility is also why first-time builders sometimes get lost: there are thousands of themes, tens of thousands of plugins and plenty of conflicting advice.
This guide cuts through it. It explains how to build a WordPress website in ten practical steps, in the order that saves the most time, with the decisions that matter at each stage. It’s written for Canadian small business owners and first-time site builders, so it covers the local details too: .ca domains, hosting in Canada, privacy and anti-spam rules, and when it’s worth bringing in professional help.
WordPress isn’t the only way to build a business website. A website builder, which uses templates and a drag-and-drop editor, can be faster for very simple sites.
| Choose WordPress if… | Consider a website builder if… |
| You expect the site to grow, with a blog, store, bookings or members area | The site will stay small and mostly informational |
| You want a wide choice of themes and plugins | You’d rather have fewer choices and a simpler editor |
| You want full ownership and the freedom to move hosts | You’re happy with the builder’s included hosting |
| You or someone you work with will keep it updated | You want almost no maintenance |
If you’re unsure, WordPress on managed hosting gives you most of the simplicity of a builder, with far more room to grow. 4GoodHosting offers both, so you can compare them on the same footing.
There are two things called WordPress, and the difference matters.
| WordPress.org (self-hosted) | WordPress.com (hosted service) | |
| What it is | Free, open-source software you install on your own hosting | A commercial service that runs WordPress for you |
| Hosting | You choose your host | Provided by the service |
| Plugins and themes | Any compatible plugin or theme | Depends on the plan |
| Control | Full | Limited by plan |
| Best for | Businesses that want flexibility and ownership | People who want a hosted blog with minimal setup |
This guide covers self-hosted WordPress from WordPress.org, which is what most business websites use and what web hosts mean by “WordPress hosting”.
Ten minutes of planning saves hours of rebuilding. Before you buy anything, answer four questions.
What is the site for? Generating enquiries, taking bookings, selling products, sharing information, or building an audience. The main goal decides what goes on the homepage and which features you need.
Who is it for? Describe your typical visitor and what they want to know before contacting you or buying.
What pages do you need? Most small business sites start with:
| Page | Purpose |
| Home | Who you are, what you do, where, and what to do next |
| Services or products | What you offer, for whom, and ideally a price or starting price |
| About | Why customers should trust you |
| Reviews or portfolio | Proof of your work |
| Contact | Phone, email, form, address, hours |
| Privacy policy | How you handle visitors’ information |
What features do you need? Contact forms, booking, an online store, a blog, a newsletter sign-up, or a members area. List them now, because they affect your hosting and plugin choices.
Gather your logo, photos and draft text in one folder before you start building. Writing content inside the editor while also learning WordPress is the slowest way to build a site.
Your domain is your address on the web. Choose one that’s short, easy to say and spell, and clearly connected to your business name.
Consider a .ca domain. For businesses serving Canadian customers, a .ca domain signals that you’re Canadian, which helps with trust and with search engines understanding which country you serve. .ca domains are managed by the Canadian Internet Registration Authority (CIRA) and require a Canadian presence, such as being a Canadian citizen, permanent resident, or a business or organization registered in Canada.
Register it in your name. Make sure you, or your business, are the registered owner, not a designer or friend. Domains registered to someone else are a common cause of lost websites.
Keep it renewing. Turn on auto-renewal and keep your contact email current. An expired domain takes your website and email offline.
Many hosting plans include a free domain for the first year. That’s convenient, but check the renewal price and that the domain is registered to you.
Your hosting decides how fast, secure and reliable your site will be. There are three common types of WordPress hosting:
| Hosting type | What you get | Best for |
| Shared hosting | An account on a shared server, with a control panel to install WordPress | Small sites on a tight budget, with someone to maintain WordPress |
| Managed WordPress hosting | A platform tuned for WordPress, with updates, backups, caching and security included | Businesses that want a well-run site without maintenance work |
| VPS hosting | Your own virtual server with reserved resources and full control | Busy stores, membership sites and sites needing custom software |
For most first business websites, managed WordPress hosting is the simplest choice: WordPress is installed for you, and the routine technical work is handled.
Where your site is hosted matters. Hosting in Canadian data centers keeps pages responsive for Canadian visitors and makes it easy to explain in your privacy policy where visitor and customer information is stored. Under PIPEDA, your business is accountable for personal information collected through your site, including what your host stores. PIPEDA doesn’t require it to stay in Canada, but Canadian hosting keeps the explanation simple. If you collect information about Quebec residents, Law 25 requires a privacy assessment before that information leaves Quebec, including to other provinces.
Check the essentials in any WordPress hosting plan: a current PHP version, SSL certificates included and renewing automatically, daily backups you can restore, caching, and support available when you need it.
As an example, 4GoodHosting’s managed WordPress plans run from $19.95 to $59.95 CAD a month with monthly billing in October 2026, for one to ten sites, and include automated WordPress installation, a free SSL certificate, daily backups, caching, a CDN and an application firewall, hosted on its Canadian cloud with 24/7 Canadian support.
How you install WordPress depends on your hosting:
During installation:
Once it’s installed, log in at yourdomain.ca/wp-admin to reach the dashboard. Spend a few minutes looking around: Posts, Pages, Appearance, Plugins, Users and Settings are the menus you’ll use most.
Security is easiest to get right at the start.
Turn on HTTPS. SSL certificates encrypt information between your site and its visitors, protecting logins, contact forms and payments. Browsers warn visitors about insecure pages that collect information. Most hosts issue certificates automatically; check that your site loads at https:// and that the http:// version redirects to it. Since March 2026, newly issued public certificates last at most 200 days, so confirm your certificates renew automatically.
Update the WordPress address. Under Settings, then General, make sure both the WordPress Address and Site Address start with https://.
Set these security basics:
Set your basic settings:
Your theme controls how your site looks. Modern WordPress themes fall into two broad types:
When choosing a theme, check that it:
Free themes from the WordPress.org directory are a safe starting point. Premium themes add features and support. Avoid “nulled” or pirated themes, which often contain malware.
After installing your theme, set your logo, colours, fonts and site navigation. Keep the design simple and consistent; clarity sells better than decoration.
Plugins add features to WordPress. They’re powerful, but every plugin adds code, updates and potential conflicts. Most small business sites need only a handful.
| Need | What it does | Notes |
| SEO | Titles, descriptions, sitemaps and structured data | Install only one SEO plugin |
| Forms | Contact and quote forms | Make sure submissions reach your inbox reliably |
| Backups | Scheduled backups to offsite storage | Skip if your host provides restorable backups you trust |
| Security | Login protection and malware scanning | Your host may already provide a firewall |
| Caching | Faster page delivery | Often handled at server level by managed hosting |
| Spam protection | Blocks spam form submissions and comments | Many form plugins include it |
| Online store or bookings | WooCommerce, booking or membership features | Only if you need them |
Before installing any plugin, check that it’s actively maintained, has good reviews and supports your WordPress version. Avoid installing several plugins that do the same job, especially two SEO or two caching plugins.
With the structure in place, build your pages using the block editor. Each paragraph, heading, image, button or column is a block you can add, move and style.
Write for real visitors:
Optimize images. Resize large photos before uploading, use descriptive file names, and add alternative text describing what each image shows.
Set up navigation. Keep the main menu short, usually five to seven items, with the contact page easy to find.
Add a privacy policy. WordPress includes a privacy policy page template. Edit it to describe what your site collects, such as form submissions, analytics and cookies, how you use it, and where it’s stored.
Many business sites need one feature beyond information pages. Plan it before you build, because it affects your hosting, theme and plugin choices.
An online store. WooCommerce is the most widely used store plugin for WordPress. Before adding it, decide how you’ll take payments, ideally through your payment provider’s hosted or embedded card fields so card details never touch your server, and confirm your provider supports Canadian dollars. Configure GST, HST and provincial sales tax according to your registration status, set realistic shipping rates, and publish clear shipping, returns and privacy policies. Stores generate traffic that can’t be cached, such as carts and checkouts, so check that your hosting plan can handle it as sales grow.
Bookings and appointments. Booking plugins let customers choose a time and service, pay a deposit and receive reminders. Look for calendar syncing with the tools you already use, time zone handling, and clear cancellation settings. Test bookings from a phone, which is where most will happen.
A newsletter. Connect your sign-up form to an email marketing service rather than sending mail from WordPress itself. Use a clear consent checkbox or sign-up form to meet CASL, and make sure your domain has SPF, DKIM and DMARC records so emails reach inboxes.
Add one feature at a time and test it properly before adding the next.
SEO for websites starts with clear, useful pages, but a few WordPress settings help search engines find and present them properly.
SEO results build over weeks and months. Focus on pages that genuinely answer your customers’ questions, and check Search Console monthly to see which searches bring visitors.
Fast sites keep visitors and perform better in search. Most of the speed of a new site is decided by a few early choices.
Check your homepage and a key service page with Google’s PageSpeed Insights after launch. Google’s page experience guidance treats a Largest Contentful Paint of 2.5 seconds or less as good, so focus on getting your main content visible quickly on phones.
Untick “Discourage search engines”, submit your sitemap in Search Console, update your Google Business Profile with the website address, and share the site with customers.
A website isn’t finished at launch. Plan for:
If you’re replacing an older site, the main risk is losing the search traffic it already earns. A careful move protects it.
Many hosts help with migration. 4GoodHosting’s managed WordPress plans include free migration for existing WordPress sites, and its team can advise on moving sites built on other platforms.
Most hacked WordPress sites are compromised through something preventable: an outdated plugin, a weak password, or an old admin account nobody removed. These habits close most of those gaps.
A host with a web application firewall and malware scanning adds another layer, but it doesn’t replace these habits.
Privacy (PIPEDA, and Law 25 in Quebec). If your site collects personal information, such as form submissions, newsletter sign-ups, orders or analytics, explain what you collect and why in a privacy policy, protect it, and keep it only as long as needed.
Newsletter sign-ups (CASL). Canada’s Anti-Spam Legislation requires consent before sending commercial emails. Use a clear sign-up checkbox or form, identify your business in every email, and include a working unsubscribe link.
Accessibility. In Ontario, the Accessibility for Ontarians with Disabilities Act requires organizations with 50 or more employees to make public websites meet WCAG 2.0 Level AA. Smaller businesses aren’t covered, but accessible sites work better for every visitor.
French in Quebec. Businesses established in Quebec should plan for French content on their commercial website under the Charter of the French language.
None of this is complicated for a small site, but it’s easier to build in from the start than to add later.
Building your own WordPress site is realistic for many small businesses, especially with managed hosting. Hiring help makes sense when:
If you’re looking into website design in Canada, ask any designer or agency:
| Question | Why it matters |
| Will the domain, hosting and site be in my name? | You should own your website, not rent it |
| Can I edit the content myself after launch? | Avoid paying for every small change |
| Which theme and plugins will you use, and are they licensed to me? | Prevents lock-in and lapsed licences |
| Who handles updates, backups and security after launch? | Maintenance is ongoing, not a one-time task |
| How will you protect my existing search rankings? | Redirects and page mapping matter during a rebuild |
| Is accessibility and mobile performance included? | Should be standard, not an add-on |
| Where will the site be hosted? | Speed for your customers and data location for your privacy policy |
There’s also a middle path: start with a website builder or a managed WordPress site, then hire a designer to refine it once you know what your customers respond to. 4GoodHosting offers custom website design alongside its hosting, if you’d rather have the build handled for you.
Time. A simple five-page site with prepared content can be built in a few days. Allow one to three weeks if you’re writing content and learning WordPress at the same time, and longer for online stores or custom features.
Ongoing costs for a self-built site typically include:
WordPress itself is free. Most of what you spend goes to hosting, any premium tools, and either your time or professional help.
Planning and setup
☐ Goal, audience, pages and features listed
☐ Domain registered in your name, ideally a .ca for Canadian customers
☐ WordPress hosting chosen, with backups, SSL and support confirmed
☐ Hosting in Canadian data centers if your customers are Canadian
☐ WordPress installed with a unique admin username and strong password
Security and settings
☐ SSL certificates active, renewing automatically, and HTTP redirecting to HTTPS
☐ Two-factor authentication for administrators
☐ Permalinks set to “Post name”
☐ Unused themes and plugins deleted
Design and content
☐ Lightweight, mobile-friendly theme set up
☐ Only essential plugins installed
☐ Pages written, with clear calls to action
☐ Images resized with alternative text
☐ Privacy policy published
SEO and launch
☐ SEO plugin configured; sitemap submitted to Search Console
☐ Google Business Profile matches the website
☐ Forms, links and mobile layout tested
☐ “Discourage search engines” unticked at launch
☐ Maintenance plan for updates, backups and content
 November 3, 2026Canadian Hosting
 November 2, 2026Business, Ecommerce
 November 2, 2026Hosting, Managed WordPress Hosting Canada, WordPress
 November 2, 2026Business, SEO
 November 2, 2026Hosting, Security & Compliance, WordPress
 November 2, 2026Business, WordPress